How to Connect a Printer to a Mac or MacBook (Wi-Fi, USB and AirPrint)
Most printers connect to a Mac in a minute through AirPrint, with no download. Here is how to add one over Wi-Fi, USB or IP address, pick the right protocol, and set up scanning.

On this page
- Quick steps
- Which connection should I use?
- How do I add a wireless printer to my Mac?
- Adding a printer by IP address: which protocol should I pick?
- Connecting a USB printer to a Mac or MacBook
- Do I need a driver on macOS 26 Tahoe or 15 Sequoia?
- Printing from a Mac to a printer shared by a Windows PC
- Setting up scanning on a Mac
- If the printer still won't add or print
To connect a printer to a Mac, put the printer on the same Wi-Fi network or plug it in by USB, then open System Settings › Printers & Scanners, click Add Printer, Scanner, or Fax, select the printer and click Add. Most current printers work through AirPrint with nothing to download. If the printer isn't listed, add it by IP address instead.
Quick steps
- Connect the printer to your Wi-Fi from its control panel or setup app, or plug it into the Mac with a USB cable.
- Choose Apple menu › System Settings, then click Printers & Scanners in the sidebar.
- Click Add Printer, Scanner, or Fax.
- On the Default tab, select your printer. The Kind column shows Bonjour, Bonjour Multifunction or USB.
- Check the Use menu shows AirPrint, Secure AirPrint or your printer's model name, then click Add.
- Open a document in TextEdit, choose File › Print, and print a test page.
These steps apply to macOS 26 Tahoe, 15 Sequoia and other recent versions that use System Settings. The same method works on a MacBook, iMac or Mac mini.
Which connection should I use?

The Add Printer window has three tabs across the top, and which one you need depends on how the printer is connected.
| Connection | Where it appears | Driver needed? | Best for |
|---|---|---|---|
| Wi-Fi or Ethernet with AirPrint | Default tab, Kind: Bonjour | No | Most home and office printers |
| USB cable | Default tab, Kind: USB | Sometimes | One Mac next to the printer, or an older model |
| IP address | IP tab | Depends on the protocol | Printers the Mac can't discover, and office networks |
| Printer shared by a Windows PC | Windows tab | Usually | An older printer attached to a PC |
Bluetooth isn't a printing option for AirPrint on a Mac. Some printers use Bluetooth during setup, but the Mac prints to them over Wi-Fi.
How do I add a wireless printer to my Mac?
A Mac can only add a wireless printer that is already on your network, so start with the printer.
- On a printer with a screen, run its Wireless Setup Wizard and join your Wi-Fi. On a model without a screen, use the manufacturer's setup tool, such as HP Easy Start or the brand's app, or the router's WPS button.
- Alternatively, Apple notes that you can connect the printer to the Mac by USB and use the printer's setup assistant to put it on Wi-Fi, then unplug the cable.
- Open System Settings › Printers & Scanners › Add Printer, Scanner, or Fax and wait 20 to 30 seconds for the list to fill.
- Select the printer. Bonjour Multifunction in the Kind column means the Mac can also scan with it.
- In the Use menu, choose Secure AirPrint if it is offered, since it encrypts the connection, or AirPrint otherwise. Click Add.
If the printer doesn't appear, check that the Mac and printer are on the same network and that neither is on a guest network. A Mac on a 5 GHz network normally sees a 2.4 GHz printer on the same router, but some ISP gateways and mesh systems keep them apart. Our wireless printer setup guide covers getting the printer on Wi-Fi for every major brand. If it still won't show, use the IP tab below.
Adding a printer by IP address: which protocol should I pick?
Adding by IP address works when Bonjour discovery fails, when the printer is on a different part of an office network, or when you want a queue that doesn't depend on discovery. First print the printer's network configuration page to get its address; our guide to finding your printer's IP address shows how on each brand.
- In the Add window, click the IP tab.
- Type the printer's IP address or host name in Address.
- Choose a Protocol (see below).
- Leave Queue blank unless the printer's manual gives a queue name.
- Give it a clear Name and, if you like, a Location.
- Check the Use menu, then click Add.
The protocol menu offers four choices:
- AirPrint: the first choice for any AirPrint printer. The Mac asks the printer what it supports and fills in the Use menu itself.
- Internet Printing Protocol - IPP: for printers that support IPP but don't advertise AirPrint. Many use the queue
ipp/print. Pair it with the vendor driver or Generic PostScript Printer. - Line Printer Daemon - LPD: an older protocol used by some office printers and print servers. Some need a specific queue name from the manual.
- HP Jetdirect - Socket: raw printing on port 9100, which most network laser printers support, not just HP. It needs a driver that matches the printer's language, so choose the vendor driver where possible.
Apple notes that printers added with these generic protocols may offer limited features. Once the printer works by IP, reserve that address in your router so it doesn't change and break the queue.
Connecting a USB printer to a Mac or MacBook

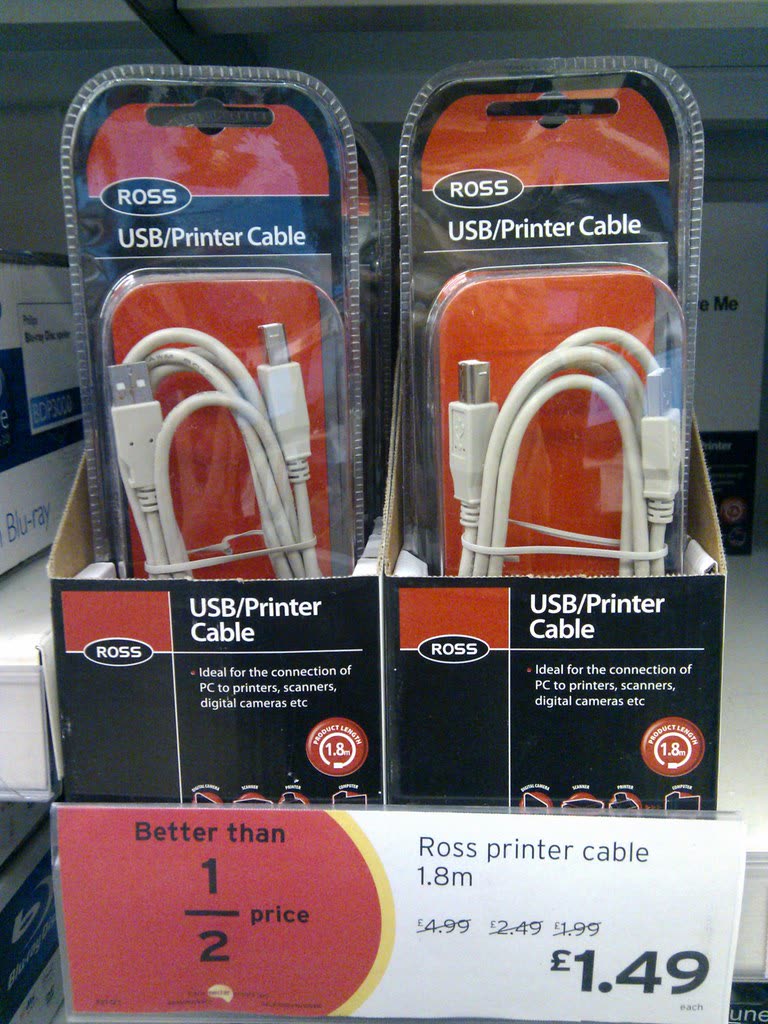
- Use a USB-C to USB-B printer cable, or a USB-C adapter or hub with the printer's standard cable. Most recent MacBooks only have USB-C or Thunderbolt ports.
- Turn the printer on and connect it. macOS often adds a USB printer automatically.
- If it doesn't, open Add Printer, Scanner, or Fax and select the entry whose Kind is USB.
- Check the Use menu and click Add.
Apple says printers that support driverless printing also work that way over USB from a Mac. Older USB printers need the manufacturer's macOS driver, and the Use menu will show Select Software or a generic entry until it is installed. If the Mac doesn't see the printer at all, the cable, adapter or port is the usual cause; our USB printer not detected guide covers the checks. To let other devices use a USB printer, turn on Printer Sharing under System Settings › General › Sharing.
Do I need a driver on macOS 26 Tahoe or 15 Sequoia?
Usually not. The Use menu tells you what you have: AirPrint or Secure AirPrint means driverless printing, a model name means a vendor driver is installed, and Generic PostScript Printer or Select Software means macOS couldn't match one.
A vendor driver is still worth installing for printers without AirPrint, for features AirPrint doesn't expose on your model (specific paper trays, finishing options, some borderless photo sizes), and for many label printers from DYMO, Rollo and Zebra. Our Mac printer driver guide covers when you need one, where to get it safely and how to install it cleanly, so there is no need to repeat it here.
Local Network permission prompts
Since macOS 15 Sequoia, and continuing in Tahoe, apps must ask before they can find devices on your network. The first time a printer or scanner app runs, such as the HP app, Epson Smart Panel, Canon's utilities or Brother iPrint&Scan, macOS asks whether it may find and connect to devices on your local network. Click Allow.
If you clicked Don't Allow, open System Settings › Privacy & Security › Local Network, turn the app on, then quit and reopen it. The standard print dialog doesn't need this permission, which is why a printer can print from TextEdit while its own app claims it isn't there. If a printer vanished right after an upgrade, our printer not working after a macOS update guide has the full fix list.
Printing from a Mac to a printer shared by a Windows PC

If a printer is plugged into a Windows PC by USB, the Mac can print to it through the PC.
- On the Windows 11 PC, open Settings › Bluetooth & devices › Printers & scanners, select the printer, open Printer properties, and on the Sharing tab turn on Share this printer.
- Keep the printer and computer names simple. Apple lists letters, numbers and a few symbols as allowed, so avoid spaces.
- On the Mac, open Add Printer, Scanner, or Fax and click the Windows tab.
- Click the workgroup (usually WORKGROUP), then the PC, then the printer. Sign in with the PC's user name and password if asked.
- Choose the vendor driver or Generic PostScript Printer in the Use menu and click Add.
This only works while the PC is on and awake, and it can be unreliable. If the printer has Wi-Fi or Ethernet, connecting it to the network directly is almost always the better long-term answer.
Setting up scanning on a Mac
Many all-in-one printers scan without extra software once they are added. To start a scan:
- Open System Settings › Printers & Scanners and click the printer.
- Click Open Scanner.
- Choose the scan mode (flatbed or document feeder), the kind (Text, Black & White or Color), the format such as PDF or JPEG, and where to save it, then click Scan.
The same scanner appears in the Image Capture app and in Preview under File › Import from Scanner. If there is no Open Scanner button, remove the printer and add it again from the Default tab, choosing the Bonjour Multifunction entry. If the scanner still doesn't appear, check that Image Capture and your scan software are allowed under Privacy & Security › Local Network, then see scanner not detected in Image Capture.
Install the vendor's software when you need scan buttons on the printer's panel to send scans to the Mac, document feeder profiles, or searchable PDFs. Our scanner not working guide covers the brand-specific tools.
If the printer still won't add or print
- Listed but jobs fail with Filter failed: the queue is using a missing or mismatched driver. See Filter failed on macOS.
- Jobs stuck in the queue: clear them with our stuck print queue guide.
- Not listed anywhere: confirm the network, then add it by IP address with the AirPrint protocol.
- Want the iPhone or iPad to print too: see our guide to connecting a printer to an iPhone.
If you would rather not spend the evening on it, our independent remote printer support plan covers Macs along with every printer in your home, and ends with a test page.
Software mentioned in this guide
- Apple AirPrint
Driverless printing built into iPhone, iPad and Mac iOS · macOS - Brother iPrint and Scan
Desktop print and scan front end that replaces ControlCenter4 on newer Brother models Windows · macOS · iOS - Canon IJ Scan Utility
The scanning front end bundled with Canon inkjet drivers Windows · macOS - Epson Smart Panel
Epson's current mobile app for setup, printing, scanning and ink levels iOS · Android - HP Easy Start
Small bootstrap installer that fetches the right HP driver for your model Windows · macOS - macOS Printers and Scanners
Where macOS adds printers, scans documents and resets the printing system macOS
Frequently asked questions
Why is my printer not showing up when I add it on my Mac?
The Mac and printer are usually on different networks, one is on a guest network, or the printer is asleep. Wake the printer, confirm both use the same Wi-Fi, and wait 30 seconds in the Add window. If it still doesn't appear, print the printer's network page and add it on the IP tab with the AirPrint protocol.
Should I choose AirPrint or the printer driver in the Use menu?
Choose Secure AirPrint or AirPrint for everyday printing, because it needs no download and keeps working after macOS updates. Choose the vendor driver only if you need something AirPrint doesn't offer on your model, such as a specific paper tray, finishing options or certain photo sizes. You can add the same printer twice, once each way.
How do I connect a USB printer to a MacBook with only USB-C ports?
Use a USB-C to USB-B printer cable, or connect the printer's standard cable through a USB-C adapter or hub. Turn the printer on, plug it in, and macOS usually adds it automatically. If not, open Add Printer, Scanner, or Fax and select the entry marked USB in the Kind column.
What does Secure AirPrint mean?
Secure AirPrint is the same driverless AirPrint printing, but the connection between the Mac and the printer is encrypted. If your printer offers it in the Use menu, it is the better choice. If only AirPrint is listed, that is fine for a home network.
Can a Mac print to a printer connected to a Windows PC?
Yes. Share the printer on the Windows PC from its printer properties, then on the Mac open Add Printer, Scanner, or Fax, click the Windows tab, and choose the workgroup, the PC and the printer. The PC must stay on. Connecting the printer to the network directly is usually more reliable.
How do I scan to my Mac from an all-in-one printer?
Open System Settings, then Printers & Scanners, click the printer and choose Open Scanner, or use the Image Capture app. If scanning is missing, remove the printer and add it again using the Bonjour Multifunction entry, and allow your scanning apps under Privacy & Security, then Local Network.
Guides credited to the PrinterSupport.io Editorial Team are researched from the manufacturers' own support documentation and our editorial policy, and updated when menus, apps or policies change. Corrections go to help@printersupport.io.
Questions & comments (0)
No comments yet. Describe your printer model, operating system and the exact message you see; comments appear after review.
Ask about this page
Your comment appears after our team approves it. Or sign in to post faster.